Hackintosh with a dying boot drive

Well, my boot drive is making a slow, occasional click (which is never good news), and my disk utility says it can’t repair the drive (which is also no beuno), so I have an SSD on the way and am busily rebuilding my boot drive (since it seems not to be working) with the anticipation of a reinstall tomorrow after work.

I’ll be re-documenting my steps and updating my previous posts to be more descriptive, as I know I’ve left some steps out.

Not how I wanted to spend my time, but maybe there will be something good come out of it, and I’ll get my audio fully working (not just the front panel I/O).

Hackintosh: Wrapup

Here’s the summary of my setup and what worked to get my Hackintosh up and running.

The Machine

  • Intel Core i5-3570 CPU 3.40GHz.
  • Biostar  H61MGV motherboard (MATX) –  American Megatrends Inc Aptio UEFI 2.3 BIOS
  • 8 GB DDR3 SDRAM (4gb 1600 and 4gb 1333)
  • Zotac Nvidia GTX 1050 Ti 2GB
  • Some random entry-level case
  • CoolerMaster Silencio 352 Mid-tower ATX/MATX case
  • 600w PSU

BIOS Setup

  • Optimized Settings (F3)
  • Disable Serial IO
  • SATA mode to ACHI

Boot Drive

Bootloader

And that’s all there was to it. It was a relatively simple setup, and knowing where to find all the pieces, along with which ones were appropriate would have helped the process take inside a few hours.

Hope this helps someone else going forward.

Hackintosh: Day 4 – Mission Complete

I’ve been a bit negligent on writing up this last post, largely because I thought I had a problem that, in the end, didn’t exist.

When I left you last, my audio wasn’t working, my video was full of artifacts and the video card wasn’t enabled, instead showing 7MB of VRAM. I am pleased to announce that a few more hours of work set me straight and everything is now up and running as I’d like. I still don’t have audio running through HDMI, but I can’t say for sure whether that’s an option on the setup I’m running. I may try to play with a few more things, but I’m so happy with the setup at the moment that I’m not really interested in playing with much else.

So what happened?

Well, I found the post called Ramblings of  a Hackintosher – A (Sorta) Brief Vanilla Install Guide by Reddit user CorpNewt. This install method didn’t work for me because it creates a UEFI USB, while I needed a legacy BIOS boot drive. What I was able to do, however, was follow the parts that detailed how to set up Clover (the Haswell configurations worked on Ivy Bridge) and the config.plist, find and install the necessary kext files, and that was all there was to it.

For the record, the following kext files and drivers worked for my setup, outside of the standard files listed on the guide:

Hope this helps anyone coming behind me, looking to replicate what I’ve managed to do.

Hackintosh: Day 3

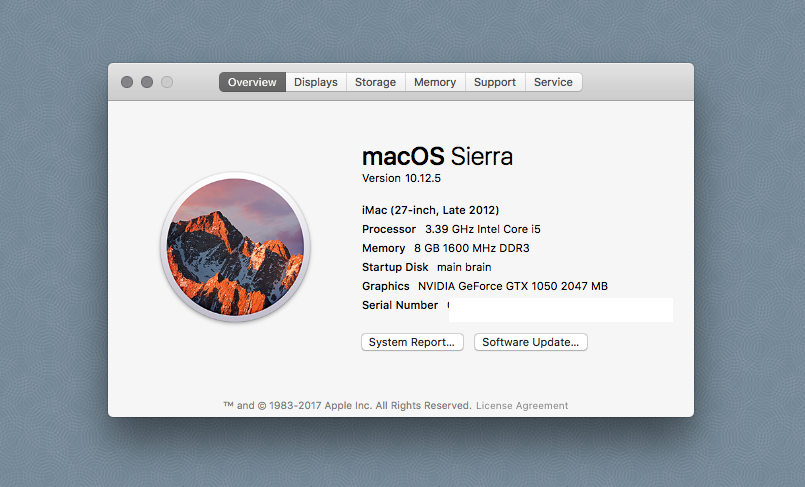
So the plan for today is figure out how to get my audio functioning and to get the NVDIA drivers installed correctly. There are reports of problems with NVDIA on 12.5, so I’m hoping there’s a solution I just haven’t found yet. If I can get audio completed today I’ll be happy, and I may have to wait for the video kexts until tomorrow. I also had some issues with Internet connectivity when booting off the hard drive but not the USB installer, which is weird.

Audio

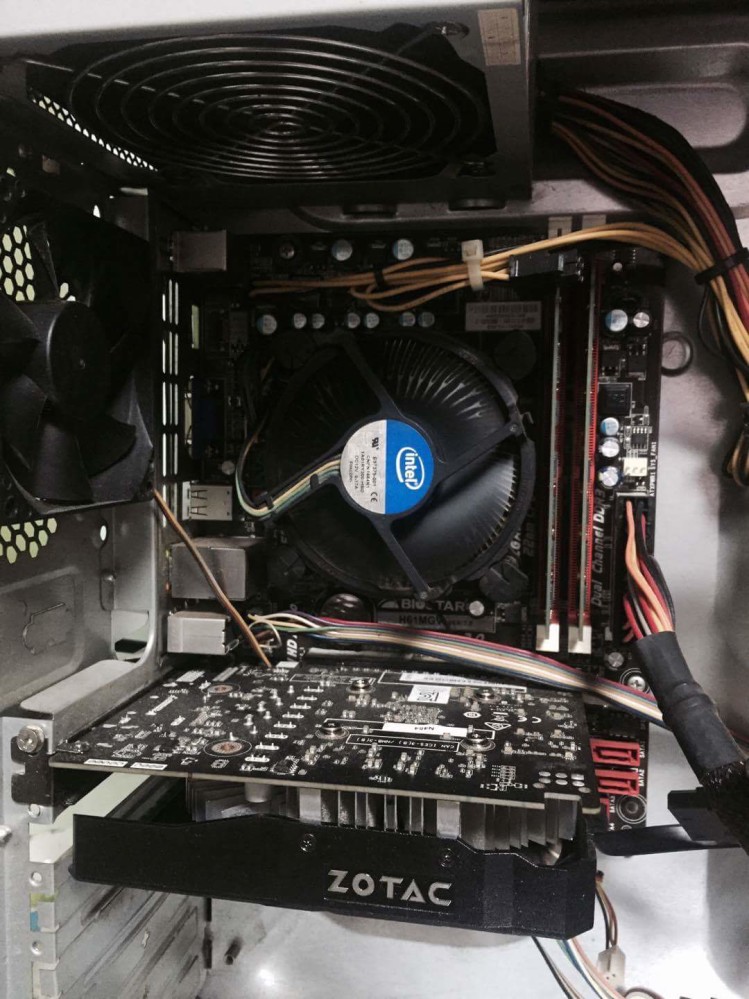
I found that the Biostar H61MGV v 7 is using the Realtek ALC662 6-Channel HD Audio drivers by visiting their website and downloading the datasheet.

Sadly the drivers are not part of the Multibeast Kext lists, so I have to go find out how to acquire or spoof the drivers to get things to work. At present, I’m following instructions by user bloomin on TonyMacx86.com. Bloomin is not using the exact same mono, but it’s by the same company and has the same driver requirements, so I’m starting here.

The first two parts of the instructions are creating the bootloader and installing Mac OS (El Cap for the example), followed by customizations for the audio driver that are as follows:

Post Installation with Multibeast:

1.Run MultiBeast
2.Select Quick Start->UEFI Boot Mode
3.Select Build -> Install.
4.Agree and press password.
5.Quit MultiBeast
6.Open system drive EFI partition and replace EFI/CLOVER/config.plist
7.Run the EFI Mounter v3 app. Select EFI partition of your USB install drive and Mount.
8.Copy EFI/CLOVER/kexts/10.11 folder of your USB install drive to Desktop
9.Remove USB device installer
10.Restart computer
11. Press F9 key and Select UEFI OS(your SATA drive)

Install audio driver and LAN driver:

1.Copy ALC662.zip to Desktop
2.Extract ALC662.zip and two files AppleHDA.kext and HDAEnabler.kext in the folder.
3.Run DPCIManager
4.Press Install Kext and open Desktop/alc662/appleHDA.kext and HDAEnabler.kext
5.Press Install Kext again and open Desktop/10.11/RealtekRTL8111.kext
6.Press Rebuild Cache.
7.Restart Computer​

I’m a bit concerned about the DPCIManager, as SourceForge has it flagged for containing Malware. Reading through the thread on the 1.5 release, another user posted a file that is supposed to be a clean version, but that’s uncertain. It seems that because the program gets specific root permissions, it gets flagged. Makes sense.

So, I followed the instructions, and the audio doesn’t work. Hm. Checking my Extensions folder, neither of the kext files seems to have been installed, so there may be something fishy going on here. I might have to try again. Trying again, I notice the log is completely empty, so there is most certainly something not working properly. After a couple of attempts, I have decided to abandon this process and search for another.

Attempt 2:

I found this video on Youtube [How to Fix Audio Problems in macOS Sierra (All ALC Codec) and it didn’t work. Trying to fix Clover through a kext editor also failed. I ran an audio_cloverALC-120 command in terminal that didn’t work either, and spit out this:

File: audio_cloverALC-120.command_v1.0f3
Release Mode
Password:
EFI partition not mounted
main brain/EFI folder found
Confirm Clover Legacy Install (y/n): y
System Integrity Protection status: enabled (Custom Configuration).

Configuration:
 Apple Internal: disabled
 Kext Signing: disabled
 Filesystem Protections: disabled
 Debugging Restrictions: enabled
 DTrace Restrictions: enabled
 NVRAM Protections: enabled
 BaseSystem Verification: enabled

This is an unsupported configuration, likely to break in the future and leave your machine in an unknown state.

OK to patch
cp: /Volumes/main brain/EFI/CLOVER/config-backup.plist: Permission denied
codec: 8419d411 is missing
S/L/E/AppleHDA.kext is not native
Install native AppleHDA.kext
No system files were changed
To save a Copy of this Terminal session: Terminal/Shell/Export Text As ...
logout
Saving session...
...copying shared history...
...saving history...truncating history files...
...completed.
Deleting expired sessions...none found.

[Process completed]

So, now I’m wondering if Multibeast is correctly installed, so I’m going to go back to the installer and try again, and see if I can find the problem.

Hackintosh Day 2: BIOS and Install Attempt

I am following the instructions found on Tonymacx86.com for setup and installation. So far I have created the boot drive with Unibeast for Sierra install, and Multibeast for later boots. I decided to go with the UEFI boot mode, but that may be a mistake. Since my board is old, and even thought it indicates I have UEFI, I might need to make a legacy boot stick.

I have only made 1 change to my BIOS, which was to change the PCI ROM Priority to EFI Compatible ROM, but this may be a mistake. If things don’t work right away I’ll come back and reverse this change. Everything else is Optimized Defaults.

Rebooting the computer shows this was a mistake, so time to remove the battery from the motherboard to reset everything and start over. With that complete, I noticed that I should also disable the Serial IO port, so we’re now back to optimized settings with the Serial IO turned off.

The UEFI boot loader didn’t work, so I reformatted the USB and used the Legacy loader instead. Hitting F9 on POST brought me to a black screen with an unblinking cursor in the upper left corner of the screen, and finally to the Clover installer. First success!

Unfortunately Disk Utility couldn’t see the HDD that was installed in the machine. I swapped out a couple of drives, but nothing seemed to work, so I took one of my spare SATA drives, put it in an external drive box and connected it to the MacBook Air that has been my setup computer, and reformatted the HDD to Mac OS Extended (Journaled) with GUID partition, as is required for a Mac boot drive. I have just restarted the target Hackintosh computer and Clover is re-starting the install process.

Unfortunately it’s still not working, so the only thing I can figure is that the installer is not connecting to the SATA drive, which is showing up for the boot drive selection. I’ll have to troubleshoot this problem and see what I can find.

Update [17:30]: Looking again at the BIOS, I noticed the SATA Mode Selection setting was IDE, not ACHI, so I just switched that over to see if it would help. I am trying the bootloader again. This change seems to have worked, as I can now see the HDD that I formatted to serve as my hard drive.

I have finished the initial install, but need to figure out how to get the 1050 Ti working properly as I have a lot of visual glitches, and I have to figure out which audio drivers I need. 12.5 is a bit tricky as it’s new and people are still figuring out the details, but maybe with a bit of time tomorrow I’ll get it solved.

Next tasks include understanding how to edit the config and kext files that are part of the setup. Ever onward!

Hackintosh: Day 1

So, my long-serving 2009 Macbook Pro finally kicked the bucket, and so I am in need of a new machine on a tight budget. Thankfully I found a unit for sale locally for a few hundred that stacks up as follows:

  • Intel Core i5-3570 CPU 3.40GHz.
  • Biostar  H61MGV motherboard
  • 8 GB DDR3 SDRAM (4gb 1600 and 4gb 1333)
  • Zotac Nvidia GTX 1050 Ti 4GB 2GB
  • Some random entry-level case
  • 120mm fan that doesn’t seem to be plugged in
  • 600w PSU
  • Windows 7 (that I seem to have broken already)

My first task was try to get into the bios setup, which wasn’t too hard. I was unable to get the Pause/Break button to work on my wireless keyboard to check the BIOS setup key command, so I used my phone to record a video of the startup, and learned it was either F12 or DEL. The wireless keyboard wasn’t sufficient to get to the bios, so I grabbed my spare keyboard I had taken to the office today and managed to get in.

The BIOS version is American Megatrends Inc Aptio UEFI 2.3, released on April 16th 2012. I found on the biostar website that there are a couple of updates for the BIOS available, so I will put those onto a USB tomorrow when I get access to a working laptop and flash the new bios onto the motherboard.

While there aren’t any tonymacx86 builds for this particular motherboard, this AMI Aptio bios has been used in other builds, especially with the gigabyte motherboards, so I’m hoping that this will be the same firmware and that I can just copy the the boot flags and what not so that I can set this up correctly without too much difficulty.

Tomorrow’s tasks start with updating the firmware, followed by making my bootloader and giving my first attempt at installing Sierra on this machine. I hope that I don’t have to go back because I’m not sure that I can actually get an older version of Mac OS, but I do have an old Lion thumb drive here from several years ago, so worst case scenario, I may be able to get it to work, but the chipset might be too new for Lion; I’m not sure. So fingers crossed, and we will see how things go.

Another side of bacon

Making homemade bacon is so easy it should almost be illegal to sell. A simple mix of sugar, salt and pink salt (as given in Rhulman’s Charcuterie) pressed liberally into all sides and them wrapped up, flipped daily for a week and then smoked or slow braised in an oven. It’s simply amazing, fresh, and satisfying. And any cut with a nice fat-to-meat ratio will do. What are you waiting for?

20121212-123353.jpg